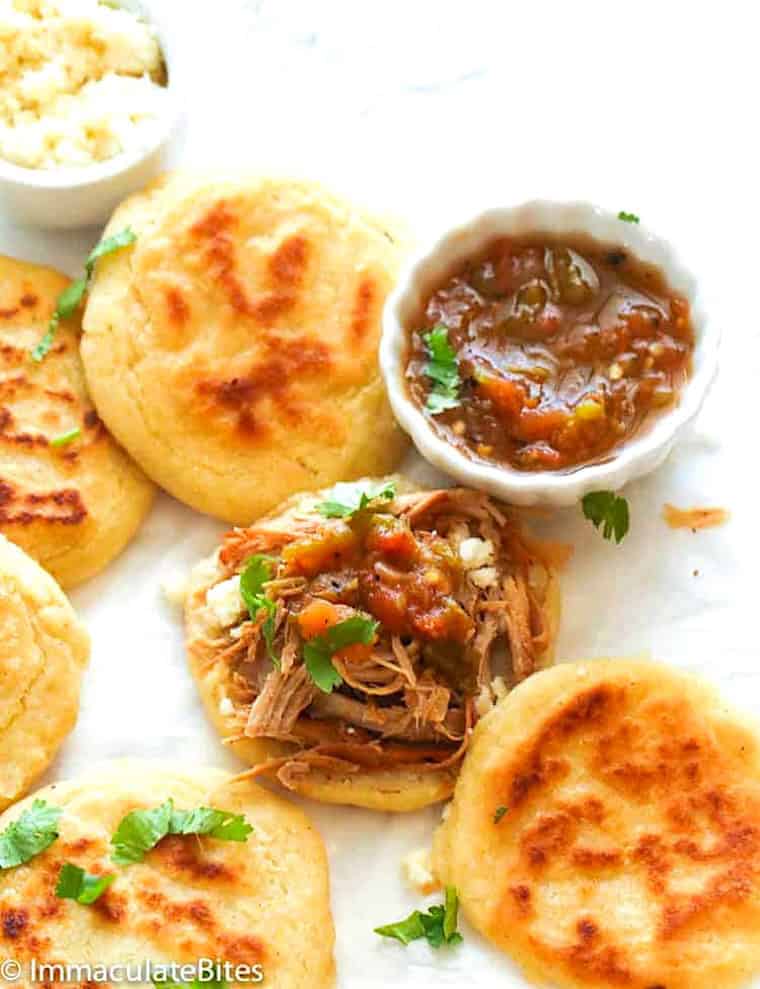
Venezuelan arepas are flat, round, savory corn flour patties made with only five ingredients for crispy-on-the-outside and tender-on-the-inside delights. This versatile Latin-American staple can be enjoyed plain, buttered, or stuffed with meat, beans, and cheese!
You know, I truly love cooking and blogging because I get to travel all over the world, trying different foods. And whenever I find a fantastic new recipe, I can’t help but put my little spin on it. Then I get anxious and excited to share it with you.
These arepas are my latest discovery and spot-on satisfying. I was surprised to see people eating these filling treats for breakfast, lunch, dinner, and snack time. Then, we ordered a few and understood why.
What Are Arepas?
This pre-Columbian staple continues to be a popular street food in Venezuela and Colombia. The main ingredient is masarepa (a.k.a areparina or arepa flour), a precooked and finely ground corn flour. Add water and salt, and you have an easy and naturally gluten-free snack.
The Venezuelan version is thicker than the Colombian one, which means it’s great for slicing open and stuffing with cheese, meat, chicken, and beans. They remind me of a Mexican gordita with a finer texture.
How to Make Venezuelan Arepas
- Mix the areparina and salt, add the melted butter and water, and mix well into a dough. Form into disks, filling with cheese if desired.
- Fry on a griddle or cast iron skillet. Optionally finish in the oven.
Recipe Tips
- If you want to avoid frying, brush the arepas with a little olive oil and bake them for 18-20 minutes at 350℉ (180℃) or air fry them for 14-18 minutes at 375-400°F (190-200°C).
- For a traditional, 3-ingredient arepa, leave out the butter and cheese.
- Colombian arepas use the same dough but are thinner and served as a side on their own or topped with butter, shredded cheese, or scrambled eggs.
- Masa harina is very different from masarepa, and it will change the flavor, texture, and the amount of water needed. However, ½ cup of gluten-free flour to 1½ cups of masa harina will achieve a similar consistency as masarepa. A teaspoon of baking powder helps it rise a bit. You can add a little flour, arrowroot starch, or tapioca starch if needed to get the desired consistency—moldable and not crumbly.
Make-Ahead and Storage Instructions
Arepas are best straight from the pan, but you can make the dough a day or two ahead. Keep it wrapped tightly in plastic wrap and refrigerate it for 2-3 days or freeze it for 2-3 months.
Store leftover arepas in an airtight container at room temperature for 3 days, 4-5 days in the fridge, or up to 3 months in the freezer. Heat them back up in a toaster, 350℉ (180℃) oven, or air fryer.
What to Serve With Venezuelan Arepas
Slice the arepa almost in half to create a pocket. Then fill it with black beans, shredded cheese, picadillo, shredded beef, avocados, or chicken salad. We love it with a side of guacamole and salsa. Not authentic, but totally delicious.
More Mouthwatering Cornbread Recipes to Try
Watch How to Make It
[adthrive-in-post-video-player video-id=”pzUQMPd0″ upload-date=”2022-07-22T14:01:37.000Z” name=”VENEZUALAN AREPAS.mp4″ description=”Venezuelan Arepas are flat, round, savory corn flour patties made with only five ingredients for crispy on the outside and tender on the inside delights. ” player-type=”collapse” override-embed=”false”]
This blog post was originally published in April 2019 and has been updated with additional tips, new photos, and a video.
Looking for more recipes? Follow on…
Prep: 15 minutes
Cook: 10 minutes
Total: 25 minutes
Latin American
-
In a large bowl, combine the masarepa corn flour and salt until thoroughly combined. Make a well in the center and add the melted butter and water.
-
Gradually stir using a wooden spoon until no dry lumps remain. Adjust the consistency by adding more flour or water as needed; the dough is ready when it doesn’t stick to the sides of the bowl or your fingers. Let it rest for about 5 minutes to hydrate.
-
Wet your hands, grab about 3 tablespoons of the dough, form a ball, and gently press it between your palms to flatten, forming about a ¼-inch thick patty. Pay attention to the edges, and smooth out any cracks. If using cheese, make a little well in the center of the dough ball before flattening. Place flattened disks on greased parchment paper and repeat with the remaining dough.
-
Heat a little oil in a large cast-iron or non-stick skillet over medium-high heat. Brown the arepas in batches, flipping once, until golden brown, for 5-8 minutes on each side. Finish them in a 350℉ (180℃) oven if you’re concerned the outside will burn before the center cooks.
-
Transfer the arepas to a wire rack and let them cool. Split them and stuff them with the desired filling: shredded chicken, pork, chicken salad, or enjoy them as they are.
- The dough should feel soft, similar to Play-Doh, and don’t forget to let it rest for about 5 minutes so the flour hydrates well.
- Wet your hands before forming the arepas so the dough doesn’t stick to your hands.
- Finishing them in the oven will give you fluffier arepas.
- Authentic arepas are gluten-free because the flour is 100% corn. However, if you’re enjoying them in a restaurant, ask to make sure because some people add white flour to the mix.
- Please keep in mind that nutritional information is a rough estimate and can vary greatly based on the products used.
Serving: 1arepa| Calories: 313kcal (16%)| Carbohydrates: 46g (15%)| Protein: 9g (18%)| Fat: 11g (17%)| Saturated Fat: 4g (25%)| Polyunsaturated Fat: 2g| Monounsaturated Fat: 5g| Trans Fat: 0.1g| Cholesterol: 17mg (6%)| Sodium: 337mg (15%)| Potassium: 169mg (5%)| Fiber: 4g (17%)| Sugar: 0.2g| Vitamin A: 290IU (6%)| Calcium: 199mg (20%)| Iron: 4mg (22%)
Course: Appetizers, Sides
Cuisine: Latin American
Diet: Gluten Free, Vegetarian